In this section you will learn about creating beautiful buttons using Buttons X button builder plugin for WordPress.
Let's get started.
1. Navigate to 'Buttons
...
' > 'Add New'. You will notice that there is already a simple button made for you. This button is just to get you started.
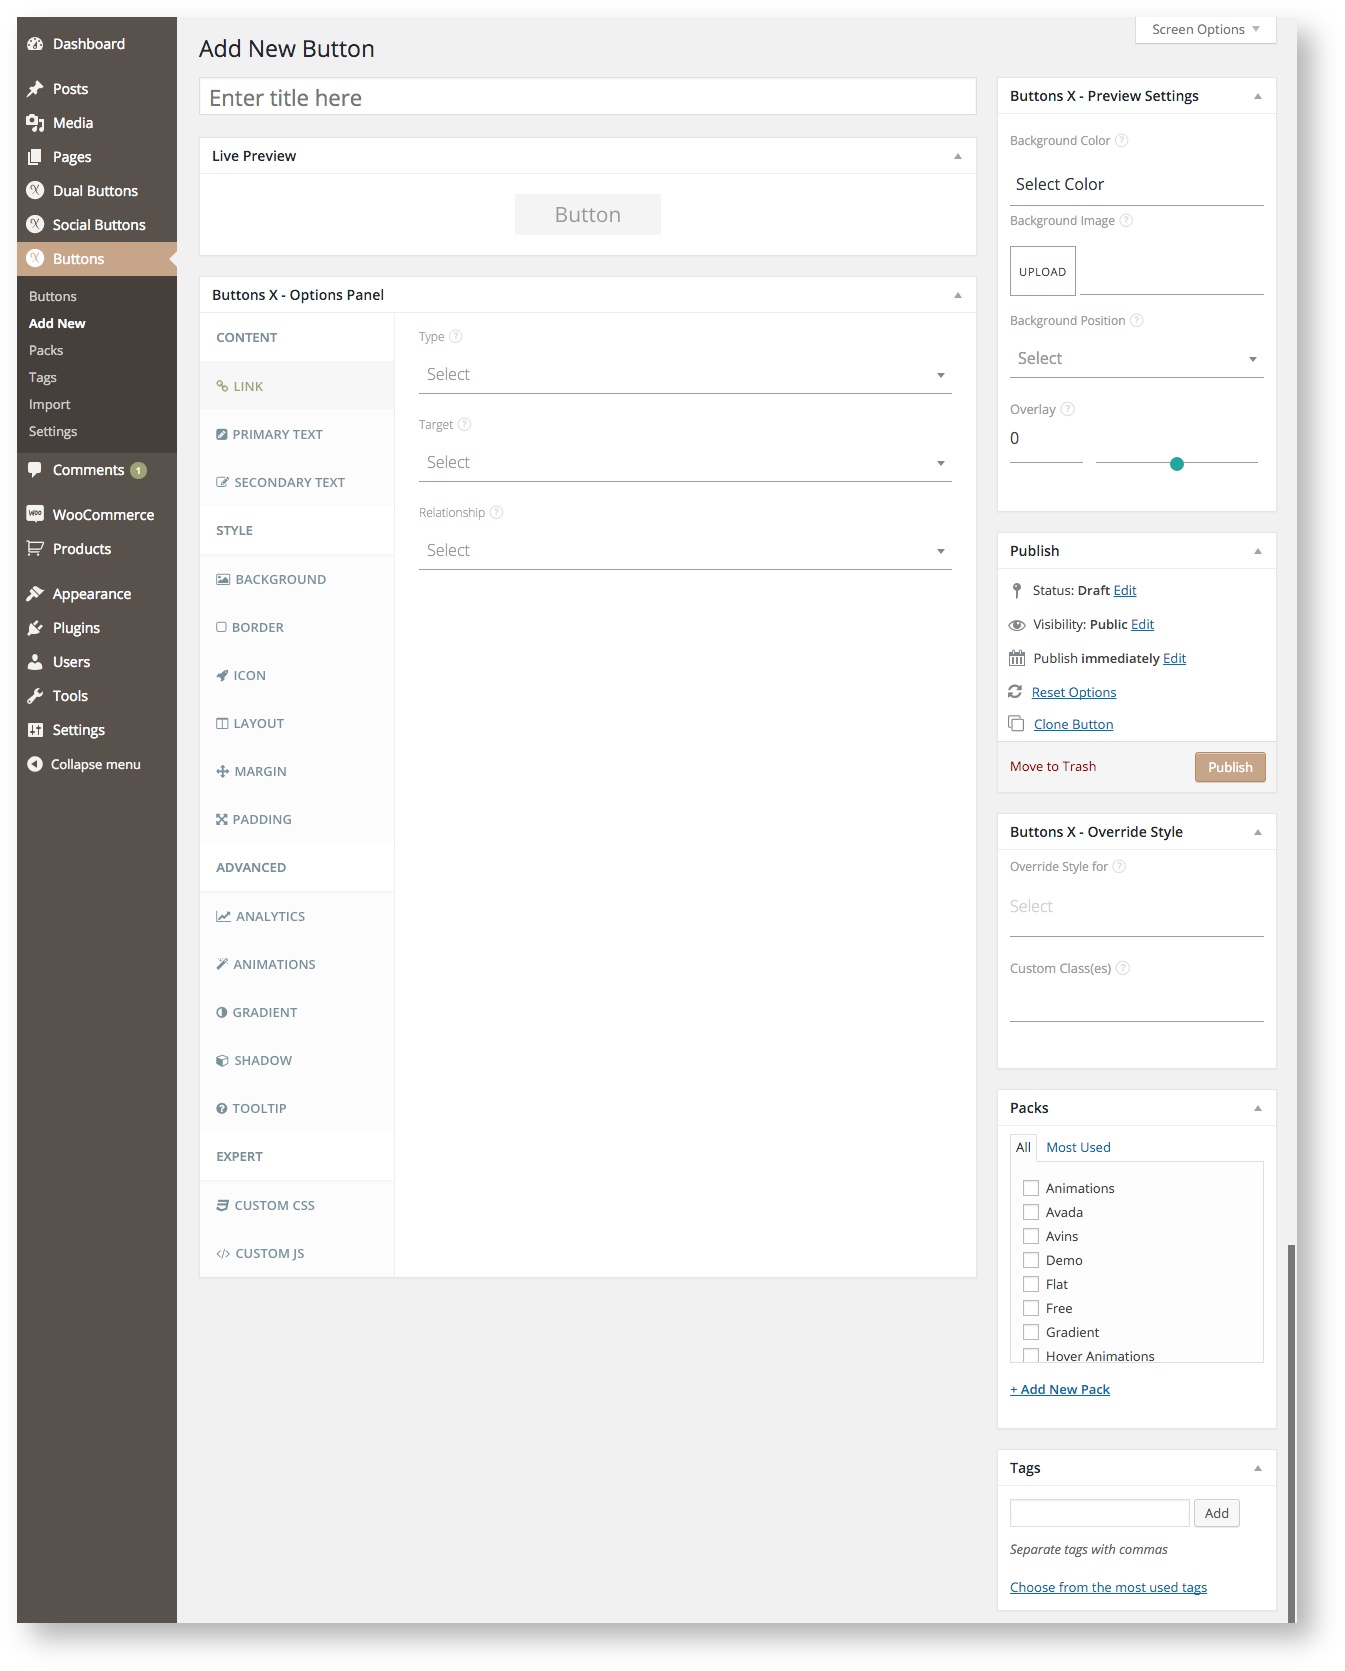
2. Under 'General' tab do the following:
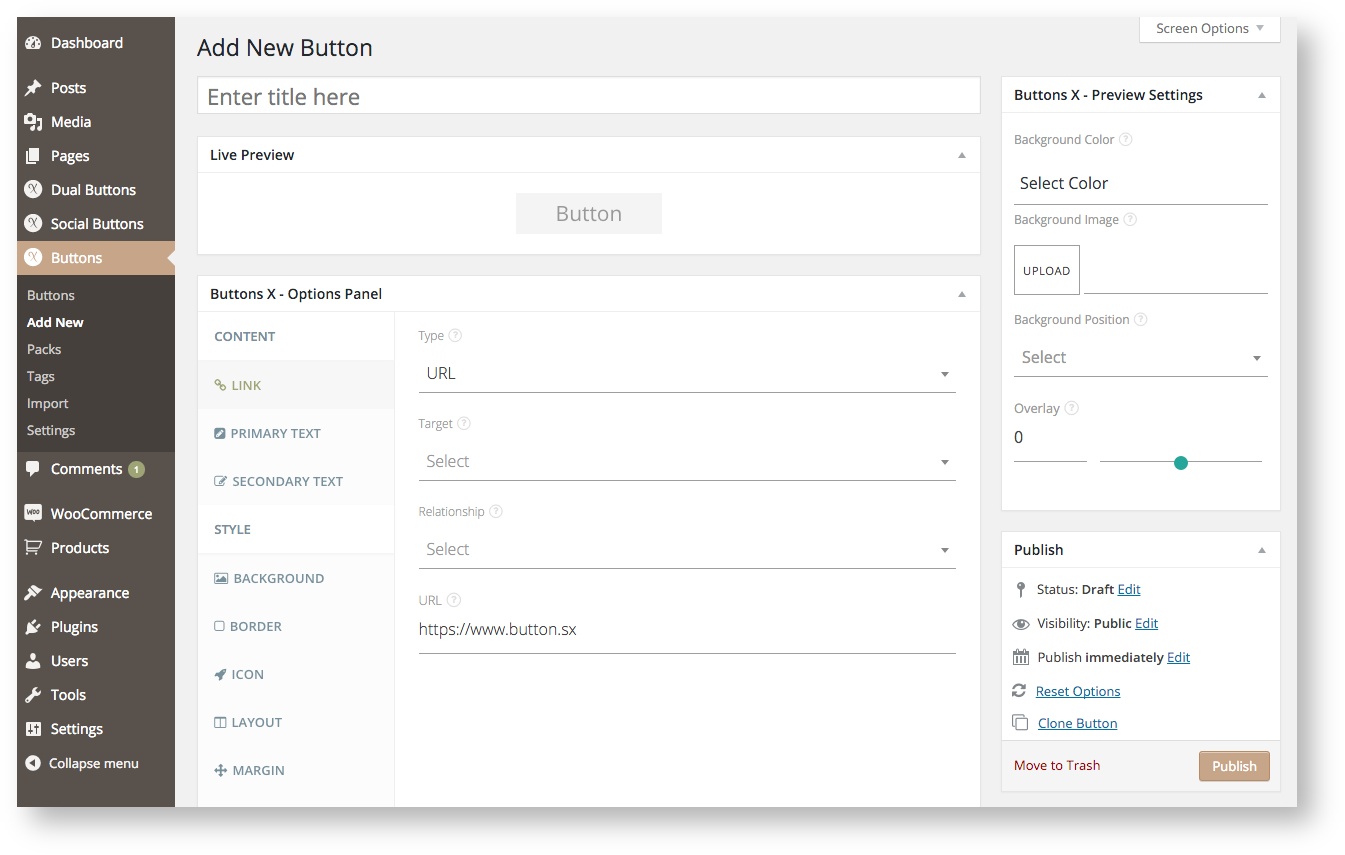
- Click 'Link' and choose 'URL' as type of link.
- Once you have selected 'URL' option you will see 'URL' field becomes visible. Add a custom URL like https://www.button.sx.
...
- Next, click 'Padding' and adjust the top, bottom, left and right padding values. You can see the button adjusting according to padding values in the live preview.
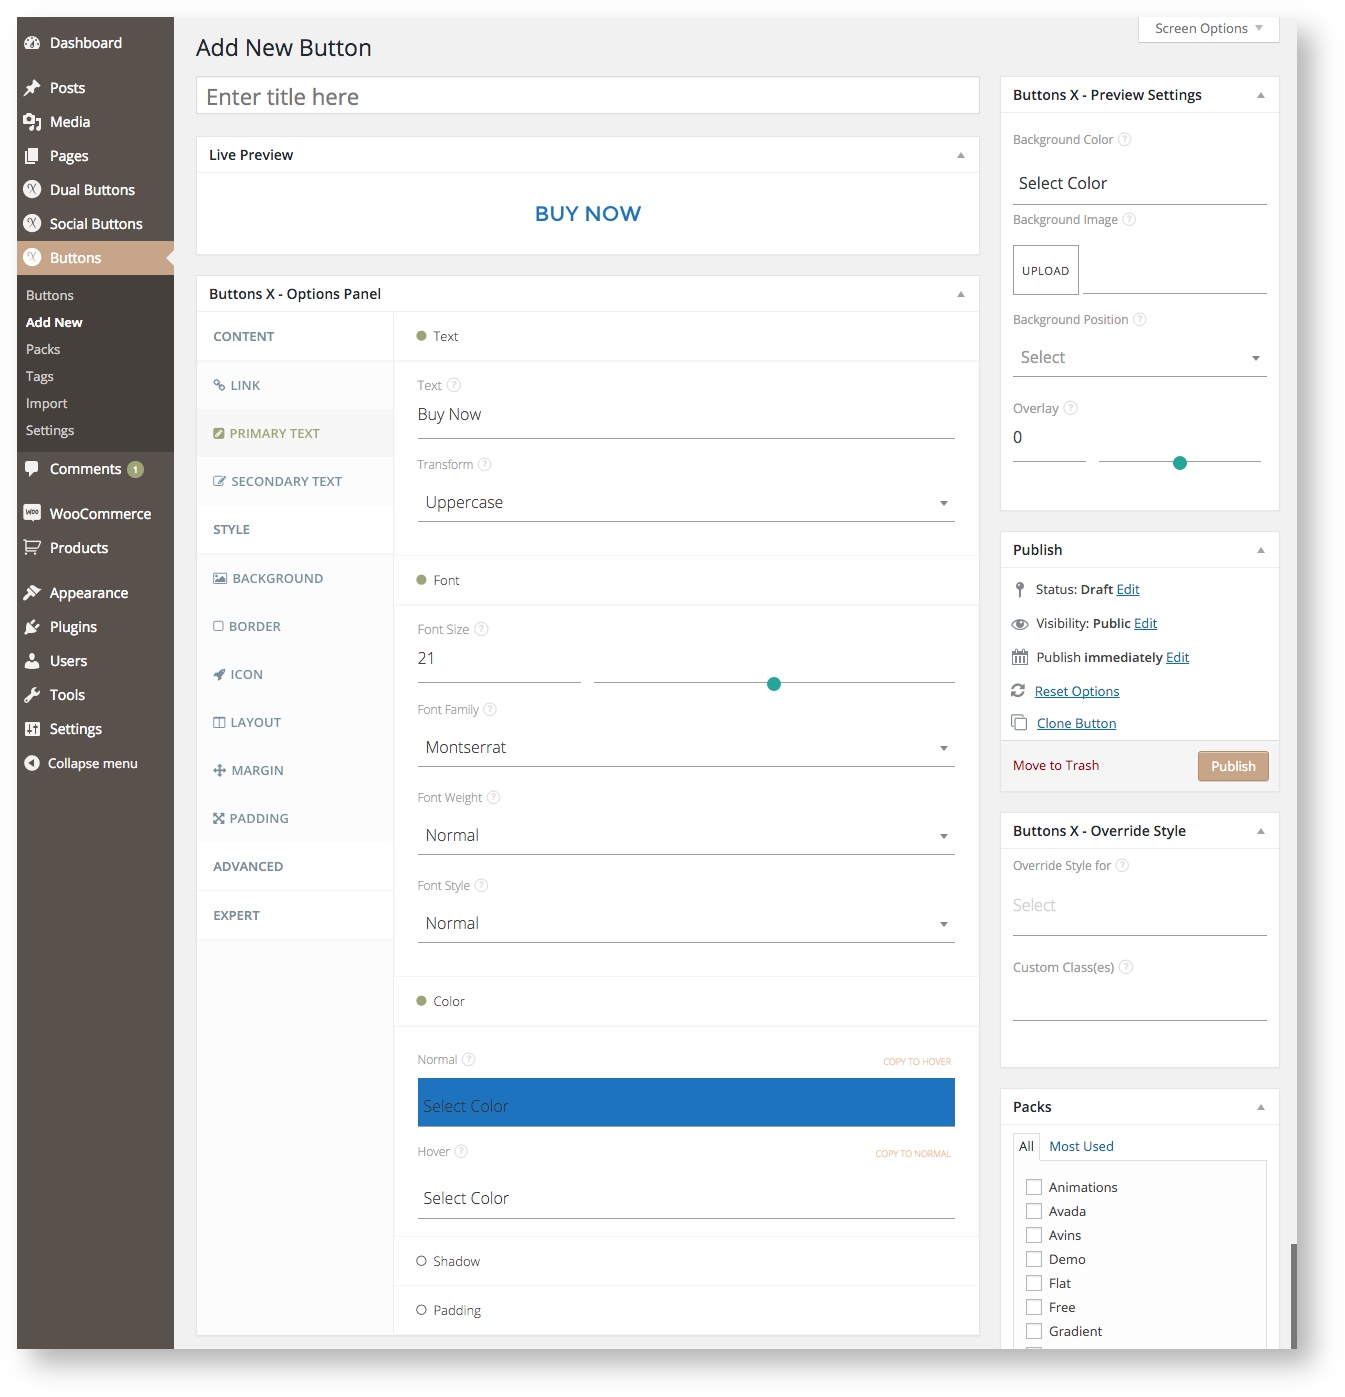
3. Under 'Primary Text' tab do the following:
- Click 'Text' and change the 'Text' field.
- Click 'Font' and change the font color.
- Click 'Color' and change normal and hover colors.
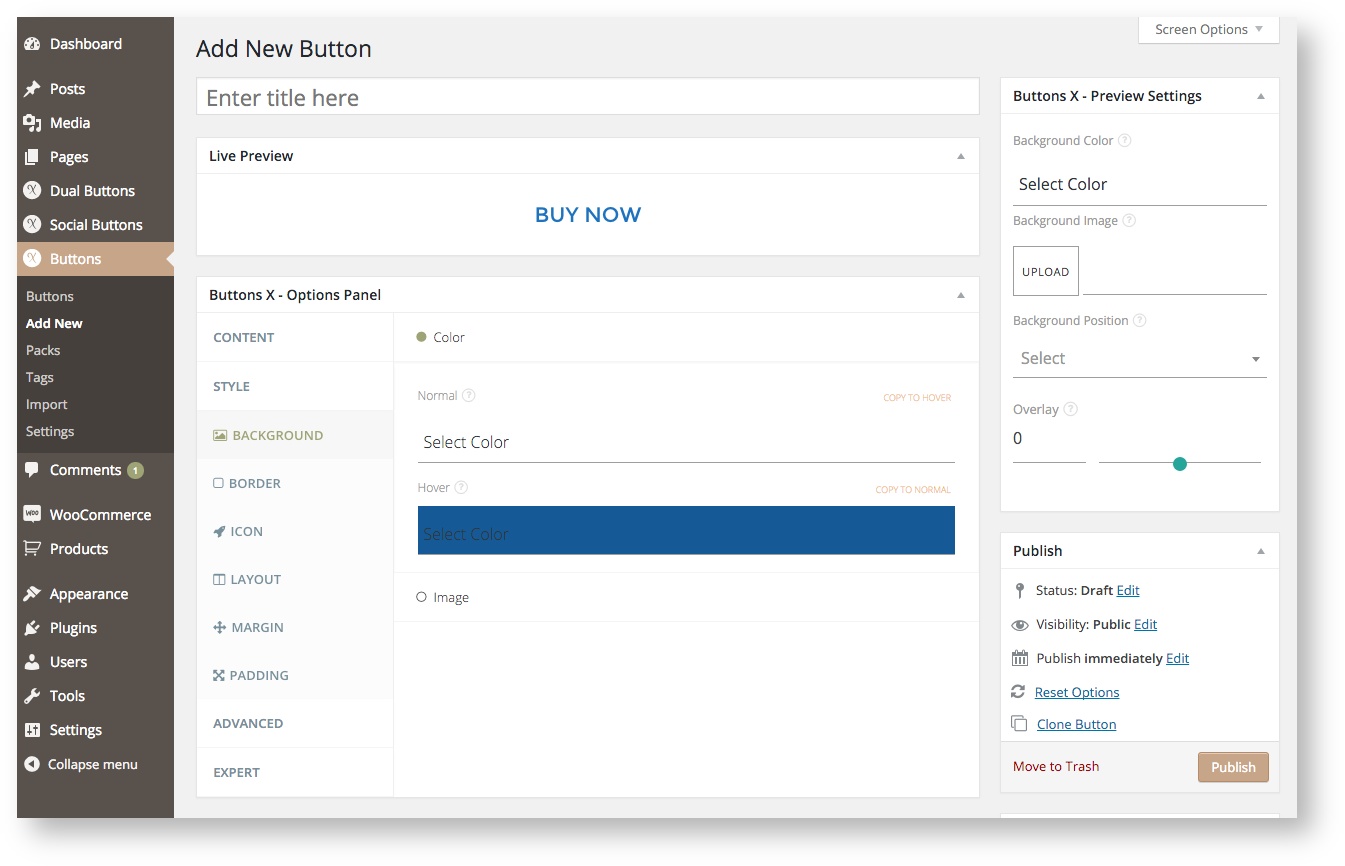
4. Next, under 'Background' tab do the following:
- Click 'Color' tab and change normal and hover background color values. Check live preview for live background color changes.
(Optional) Add a pack and tags to easily find your button when you have lots and lots of buttons.
Once you have finished all these steps, give button a title and save the button and you will get a simple button to put on your website.
Now, navigate to 'Buttons X -' > 'Buttons' and you can find the button short code in the 'ShortCode' column. Put this short code wherever you would like to display the button (on a post, page, etc.).