/
How To Create Morphed Full Screen Button
How To Create Morphed Full Screen Button
- Gautam Thapar
Owned by Gautam Thapar
Looking to create a full screen button morphed style? Follow the instructions below.
Step-by-step guide
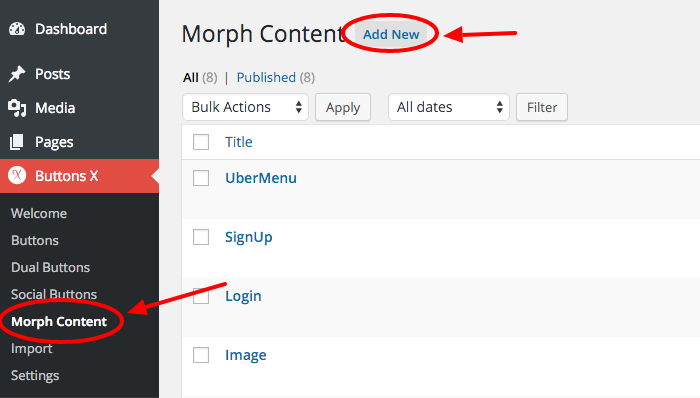
- First of all we need to create morphing content.
- To create morphing content visit 'Morph Content' page and click on 'Add New' button.
- Now we need to add content. Add whatever content you would want to display using the post editor. After that save the content by clicking 'Publish' or 'Update' button.

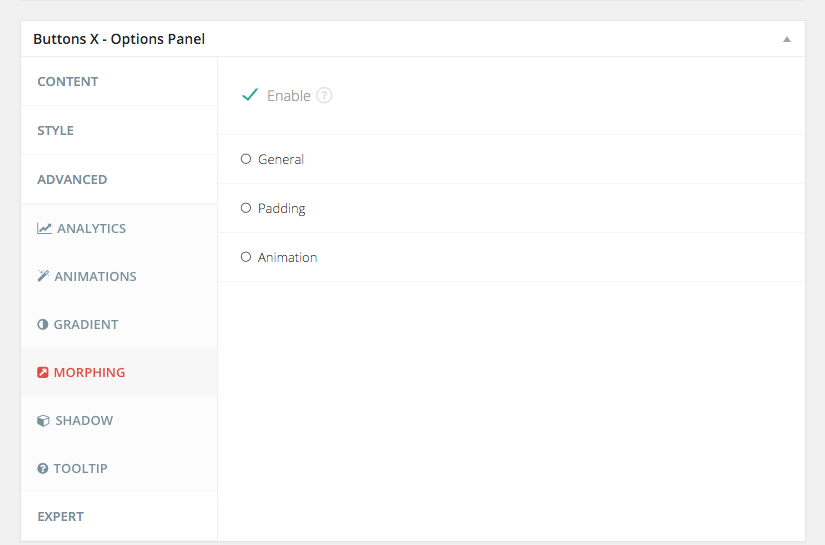
- We have our content ready so now we need to configure the button. Once you have created a button using Buttons X move over to 'Morphing' tab and enable button morphing.
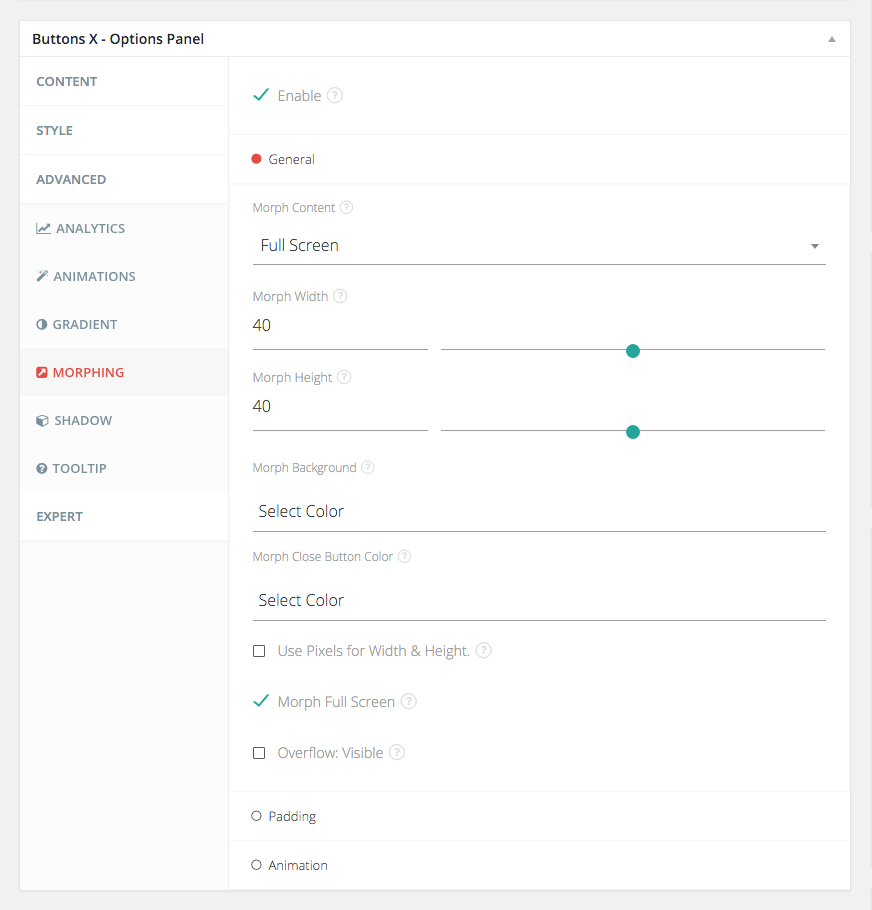
- Now we need to configure some general settings for our modal window (morphed button). So let's click the general tab and open up the settings. Under 'Morph Content' select the morph content you created in step 3 above. I named it as 'Full Screen' so I will select 'Full Screen'. Then you need to define the width and height of the modal window. By default width and height are considered as percentage values in respect to the user's screen size. Add 40 as value for both 'Morph Width' and 'Morph Height' input fields. 40 means the modal will cover 40% of user's screen. By default the button background colour is used for modal background. You can select a different background if required. Now in order to make our modal cover the entire screen we need to check the 'Morph Full Screen' checkbox.
- Leave the padding to their default values and just save the button. Place the button short code wherever you want this button to appear. That's it!
Animations for mobiles and tablets are disabled in order to have consistent behaviour across all devices.
Related articles